Sunday, April 29

Update: Not-Guac Avocado Dip

Last spring I posted about a word-of-mouth recipe I got from my dad called "Not Guac Dip".  I rambled on and on about how you needed to embrace your adventurous side and give this recipe a shot because the flavors are out of this world.  It's been a little less than a year since I shared the recipe but so far, everyone who has tried it has loved it.

Photobucket

As we move into the season of grilling and sipping margaritas and cold beers on the deck, I wanted to share an updated version of this recipe along with a handy tip. 

This updated version uses a white balsamic vinegar instead of your regular dark balsamic.  It's an easy fix for those who are put off by the discoloration that the dark balsamic gives the dip.  Both my Mom and Roy prefer the taste of the white balsamic over the regular dark balsamic so it's a win-win for them.

Photobucket

And now for the tip... if you've ever made anything with avocado in it, you know how quickly it goes from green to brown when it's exposed to air.  Pressing plastic wrap onto the surface only helps so much.  However... if you hang on to the pit and add it back into the bowl after you're finished making the dip... it keeps the avocado from turning brown.  I tested it last week and the dip still looked fresh after 6 hours. 

Photobucket

This is great with tortilla chips but if you have leftovers, I highly suggest it over some undressed iceberg lettuce.  Add it to your list today. You won't be disappointed!

*****

"Not Guac" Avocado Dip
serves 4-6
2 ripe avocados
2 Roma tomatoes
Half a medium red onion, finely diced
1/2 cup Feta cheese, crumbled
Garlic salt
Olive Oil
White Balsamic Vinegar

Roughly chop avocados into chunky pieces.  Roughly chop tomatoes into chunky pieces (remove seeds and watery insides).  Finely dice half a red onion.

Combine avocados, tomatoes and red onion in a medium bowl.  Sprinkle in 1/2 cup of crumbled Feta cheese.  Give it a light sprinkle of garlic salt (remember, you can always add more).  Stir gently to mix.

Drizzle lightly with olive oil and then with balsamic vinegar adding a bit more balsamic vinegar than olive oil.  Again, go easy.  You can always add more later.  Stir gently to combine.

Test with a tortilla chip and add more olive oil and balsamic vinegar as needed.  I like my dip to have more balsamic than olive oil since it gives the mixture an unexpected but fantastic flavor.

Enjoy!  Know that the longer this sits, the more the flavor builds.  And definitely try your leftovers on a salad, you won't be sorry.

Wednesday, April 25

3 Ingredient Mini-Apple Tarts

Despite my new found interest in baking from scratch, I can still appreciate really delicious food that requires minimal effort.  Like these 3 ingredient mini-apple tarts.

Photobucket

Ok technically it's 4 ingredients if you count the vanilla ice cream.

My Mom actually found this recipe in a magazine advertisement.  It's cheap and easy and gives you all kinds of warm and fuzzies with a quarter of the effort of a traditional apple pie.

The 3 ingredients?  1 can of apple pie filling, a sprinkle of ground cinnamon, and a package of regular Pillsbury Crescent Rolls.  Don't get the reduced fat or store brand of the crescent rolls, I find they tend to pull apart and holes will appear very easily.  You want something that's going to hold together well.  Pillsbury is the best.

Not surprisingly, the apple pie filling tastes just like... apple pie!  It's delicious.  I use More Fruit brand because of the quality and flavor of their apples.  And the Pillsbury Crescent Rolls are light and buttery, just like you'd expect in a pie / tart crossover.  The shape and size of the crescent roll is perfect, giving you a nice ratio of apple to dough - something that's critical with pie!  The scoop of vanilla ice cream just pushes it over the edge. 

You start by adding a sprinkle of cinnamon to your apple pie filling and stirring to mix it around.  Be careful, you really just need a sprinkle.  What you see below is what I added before stirring.  I also added a pinch more about half way through. 

Photobucket

Line a baking sheet with parchment paper and open your crescent rolls.  Scoop some of the apple pie filling into the middle of a single crescent roll.  I probably used 1/4 cup of the filling or about 4 large apple slices.  You can eyeball it.

Photobucket

Bring the three corners together so they overlap and (nearly) enclose the apple pie filling.

Photobucket

Bake in a 375 degree oven for 10-12 minutes.

Photobucket

Then try not to eat all of them. 

Photobucket

This has to be one of my favorite homemade desserts.  It's easy enough for a weeknight, but delicious enough to cap off a big weekend meal.  Enjoy!

*****

3 Ingredient Mini-Apple Tarts
10 mins active, 20 mins total
Serves 8

1 can More Fruit apple pie filling
Sprinkle of ground cinnamon
1 package Pillsbury Crescent Rolls

Preheat your oven to 375 degrees.  Line a baking sheet with parchment paper.

Sprinkle a dash of ground cinnamon over the apples.  Stir to mix the cinnamon and the apples together.

Scoop some of the apple mixture into the middle of a crescent roll.  Bring the corners together to close the tart. 

Bake for 10-12 minutes.  Serve warm with a scoop of vanilla ice cream.  Refrigerate leftovers.

Sunday, April 22

Ma Rob's Family Favorite Lasagna

After the big homemade pizza extravaganza, Roy decided he wanted to try his hand at some homemade lasagna.  Never one to turn down comfort food I quickly agreed and was told just as quickly that ROY wanted to make the the lasagna.  By himself.  My help was not needed, thankyouverymuch.

I'm sure you're thinking, that's wonderful!  You have a man who wants to cook for you.  To that I would say you are clearly unfamilar with the rule at my house which is "she who cooks does not clean up". 

That meant I'd be on clean up duty after Roy's lasagna-from-scratch evening.  One that would include chopping parsley with two knives, not one.  Because dueling knives is so much more efficient.  So much.

Anyway, back to the gooey, cheesy lasanga goodness...

Photobucket

We used my Mom's recipe.  It's what I grew up eating as a kid and got rave reviews from Roy at the holidays.  I like this recipe a) because it's fantastic and reminds me of home and family.  And b) because it uses cottage cheese instead of Ricotta.  My body and Ricotta don't get along so it's a pretty important piece.

Photobucket

This recipe is decades old and beyond tried and true.  My Mom had it in her recipe box well before I came along.  It's a nice blend of homemade touches (like the meat sauce) and helpful shortcuts (like oven-ready, no-boil noodles). 

Although I could see my Mom's eyeballs rolling all the way from Florida, I swapped the ground beef for ground turkey.  Technically it was Roy's choice.  I was a bit nervous about how it would turn out but figured we could try it at least once.  I was pretty impressed with the results!  I didn't even remember I was eating ground turkey until the 2nd day and it was definitely more of a positive then a negative.

Here's the sauce simmering with the ground turkey, tomatoes, herbs and spices.  I love how rich and flavorful it is, without overwhelming the flavor of the cheeses.

Photobucket

We made two smaller lasagnas so we could eat one and freeze one.  Once you've made the sauce, get your pans going with a bit of sauce and then lay down your first layer of oven-ready, no-boil noodles.

Photobucket

Top with cottage cheese, mozzarella.

Photobucket

And them some grated Parmesan.

Photobucket

Add another layer of noodles, then sauce, then cottage cheese, mozzarella and Parmesan. 

Photobucket

Then do one more layer of noodles, sauce, SKIP the cottage cheese and go straight to the mozzarella and Parm.  Pop it in the oven and this is very important:  bake according to the directions on the noodle package.  It will probably be a combination of 30 mins or so covered with aluminum foil and 15 mins or so uncovered to make the cheese bubbly and brown.  

Let it stand for 10-15 minutes before cutting in and serving.  That will keep it from falling apart the moment you try to dig a piece out with a spatula.  And it gives you plenty of time to prep your salad and make some garlic bread.

Photobucket


This is comfort food perfected in my opinion.  And it's good any time of the year!  I suspect we'll be digging into the frozen one sooner rather than later :) 

*****

Ma Rob's Lasagna
45-50 mins active, 1 1/2 - 2 hours total
serves 6-8

1 lb ground beef or turkey
3/4 c. chopped onion
2 T. vegetable oil
1 lb (or 16 ounces) diced tomatoes with Italian seasonings
1 can tomato paste
1 c. water
1 Tbsp chopped parsley
2 tsp salt
1 tsp sugar
1 tsp garlic powder
1/2 tsp pepper
1/2 tsp dried oregano leaves
1/2 of an 8 ounce package of oven-ready lasagna noodles (aka: no boil noodles)
24 ounces 2% or no-fat cottage cheese
18 slices of mozzarella cheese
1 c. grated Parmesan

Brown the ground beef or turkey lightly in oil with the chopped onion.

When browned, add diced tomatoes, tomato paste, water, parsley, salt, sugar, garlic powder, pepper and oregano.  Simmer uncovered for 30 minutes, stirring occasionally.

Spray your pan(s) with no-stick spray and spread a thin layer of sauce evenly over the bottom.  Lay down your no-boil noodles breaking them to fit your pan if necessary and making sure they overlap a little bit. Add more sauce and then a layer of cottage cheese, mozzarella and Parmesan.

Repeat starting with noodles, then sauce, cottage cheese, mozz and Parm.

Repeat one more time WITHOUT cottage cheese.  So just noodles, sauce, mozzarella and Parmesan.

Bake at the time and temp directed on your noodle package.  Allow to stand 10-15 minutes before serving.

Thursday, April 19

Quick Tip: extend the life of your berries

A few weeks ago I talked about how I had just bought approximately two metric tons of fresh fruit from Costco and I was thinking that my healthy eating habits had hit a tipping point.  [Side note: we did in fact make it through almost all the fruit we bought, just working through the last few apples now]

Well 5 days later I got up early for a 6:30am hot yoga class with a girlfriend and after class immediately went to the nearest Dunkin Donuts for a coffee and donut with sprinkles. 

So... maybe that tipping point is a bit farther off than I thought.  That's what I get for blogging about my healthy eating habits! 

Anyway, I bought the fruit intending to try out a new vinegar wash that I found on Pintrest.  Fill a bowl with a mixture of one part vinegar to ten parts water (white vinegar or apple cider vinegar is best).  Dump the berries in and swirl them around to dislodge dirt, mold spores, etc.  Because the vinegar in the solution is so diluted you can either drain and put the berries right in the fridge or rinse them in fresh water.  The tip says you can pop them right back into the fridge but I was worried that leaving them wet might be problematic so I dried mine on a kitchen towel covered with a paper towel for about 30 mins. 

Photobucket
Drying my blueberries and washing my strawberries

Does this give you two weeks like the Pintrest tip said it would?  Not really.  But it does extend the quality of the berries quite a bit in my opinion.  I've done this twice now and I've lost zero berries to mold or soft spots.  Sure they still get a bit wrinkly but they last much longer than most out of season berries do.  I feel a lot less guilty buying pricey produce knowing that I'm going to get my money's worth.

Any other tips for extending the shelf life of produce?

Sunday, April 15

Teriyaki Asian Tacos

When my Mom called and told me about this recipe I was amazed. The idea is so basic yet it's never even crossed my mind. Even before I made it, I knew this would be one of those that gets added to my regular rotation. It comes from a longtime family friend, Mrs. Thornton. 

Mrs. Thornton has been in our lives for what feels like forever.  She's the kind of family friend who has been a part of your life for so long you forget how and when they came to you in the first place.  She has literally known my brother since he was in the womb and was a fixture for us growing up as she was our "emergency contact".  My Mom repaid the favor for her kids as well.  The highlight by far was the time she was called to school to pick up Mrs. Thornton's son after he fell off the roof while chasing a wayward ball (he was fine, don't worry).

The kids are (mostly) all grown and now my Mom and Mrs. Thornton are on to grandbabies and granddogs.  The last time they caught up, Mrs. Thornton shared this recipe with my Mom.  It's original form was as a ground chicken mixture with pine nuts and teriyaki sauce that goes in lettuce wraps.  Think PF Changs only super, super easy.  Because I never seem to be full from lettuce wraps, I switched it up and served the mixture over some steamed rice.


Photobucket

DELICIOUS.

I know calling this "Teriyaki Asian Tacos" makes no sense at all.  But stir fry seemed inappropriate since there's no wok.  And the ground chicken with the veggies and the sauce... it's so close to the way I do tacos, just with Asian flavors.  It used it to describe the recipe to Roy and it stuck. 

So Teriyaki Asian Tacos it is!

Photobucket

I used a little bit of diced celery and matchstick carrots for color and texture.  The original also called for pine nuts but I used cashews because I love cashews with Asian flavors.  I added a sprinkling of toasted sesame seeds and served this with steamed white rice.  I really like the sauce that Mrs. Thornton recommended - Mr. Yoshida's.  It's not as abrasive as regular Teriyaki can be and it eliminates the need to add spices or cook down the Teriyaki on it's own until it thickens.  Which means it's perfect for weeknights!

Photobucket


If you want to stay true to the original recipe, serve this in a romaine or Belgian endive lettuce cup.  Enjoy it as an appetizer or like we did, as a full meal and switch up the veggies to make it work for you.  And by all means, feel free to suggest some new names for the dish!

*****

Teriyaki Asian Tacos
20 mins active, 4-6 servings

[FYI - this is an "eyeball" recipe meaning I just added things until it looked right, so the amounts below are more guidelines than exact measurements.  Feel free to tweak the amounts so they work for you.]

1 lb ground chicken
1 medium onion, diced
3/4 cup diced celery
1/2 cup matchstick carrots
1/4 cup roasted unsalted cashews
1/2 cup (or more) Mr. Yoshida's Sweet Teriyaki sauce
toasted sesame seeds (optional)
steamed brown or white rice (optional)
lettuce cups (optional)


Brown ground chicken and onion in a large skillet.  Drain and return to pan. 

Add sauce, diced celery and cashews and mix so everything is coated in sauce.  Make sure to add enough sauce to give the chicken moisture.  You don't want dry ground chicken!  Heat on medium or low until sauce is warmed through and celery and cashews have softened just a bit. 

Sprinkle with matchstick carrots and toasted sesame seeds.  Serve over steamed rice or with in lettuce cups.

Monday, April 9

Homemade Veggie, Margherita and Three Cheese White Pizzas

Chicago is a great place to live if you like to eat and we're very fortunate to have friends here who are fellow "eaters" like us. 

These friends, who also go by John and Kylie, have helped us dream up things like bacon wrapped buffalo wings, introduced us to the best Peking duck place for miles (Sun-Wah BBQ) and inspired the Thai challenge which is what happens when someone challenges the honor of your fave Thai joint and claims that theirs is better.  So you each order a noodle dish, a curry dish and an order of crab rangoon and meet on neutral territory with a bottle of wine to eat, compare and vote like it's an episode of Top Chef.  [FYI - our place, Opart Thai, won by a hair but John and Kylie have requested a rematch]

Anyway, back to the point - John and Kylie love to eat and Kylie is a wonderful cook.  Earlier in the year they hosted us for a fabulous French meal that included homemade French onion soup, greens with baked goat cheese and a mustard vinaigrette, coq au vin, rustic bread and a fresh apple tart. On a scale of 1 to 10, it was a 15. 

We repaid the favor by hosting John and Kylie along with Roy's sister Christine for some homemade pizza Saturday night. I checked my normal OCD at the door and decided that despite having never made pizza at home before, this would be a great time to go authentic with homemade sauce, dough from scratch and a pizza stone (which Roy bought approximately 60 minutes before the arrival of our guests, I told you I checked my OCD at the door).

Worst case I figured we'd call Home Made Pizza Co. and have them deliver some uncooked, plain dough.  Because that's the kind of friends John and Kylie and Christine are.  The kind that are happy to just have another glass of sangria and go with the flow.  Love those kinds of friends :)

Photobucket
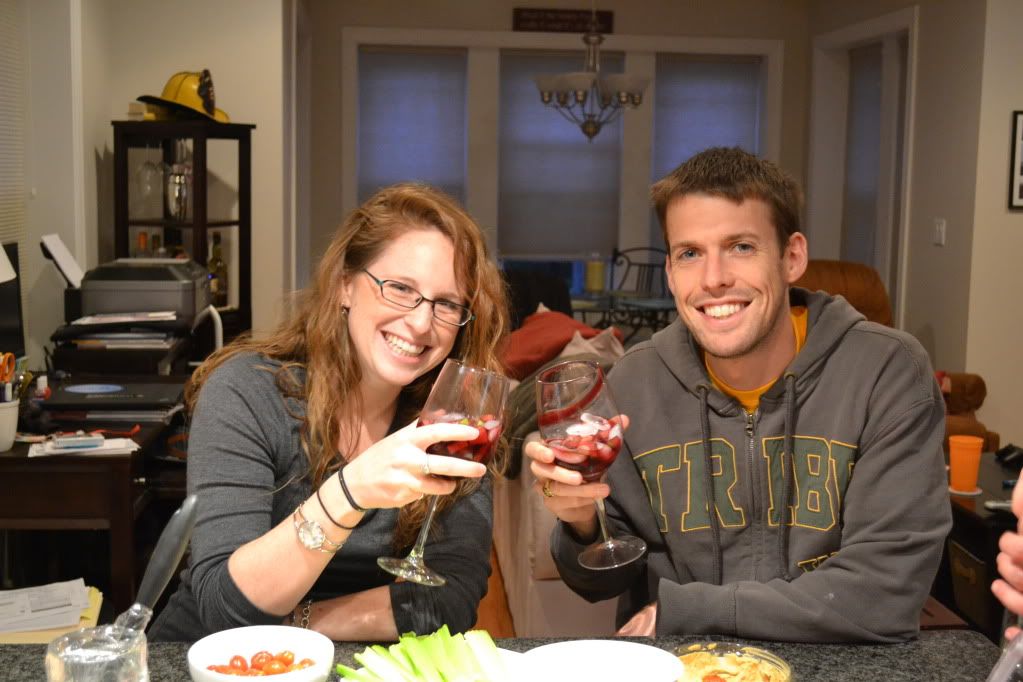
John and Kylie enjoying some sangria and apps


Photobucket
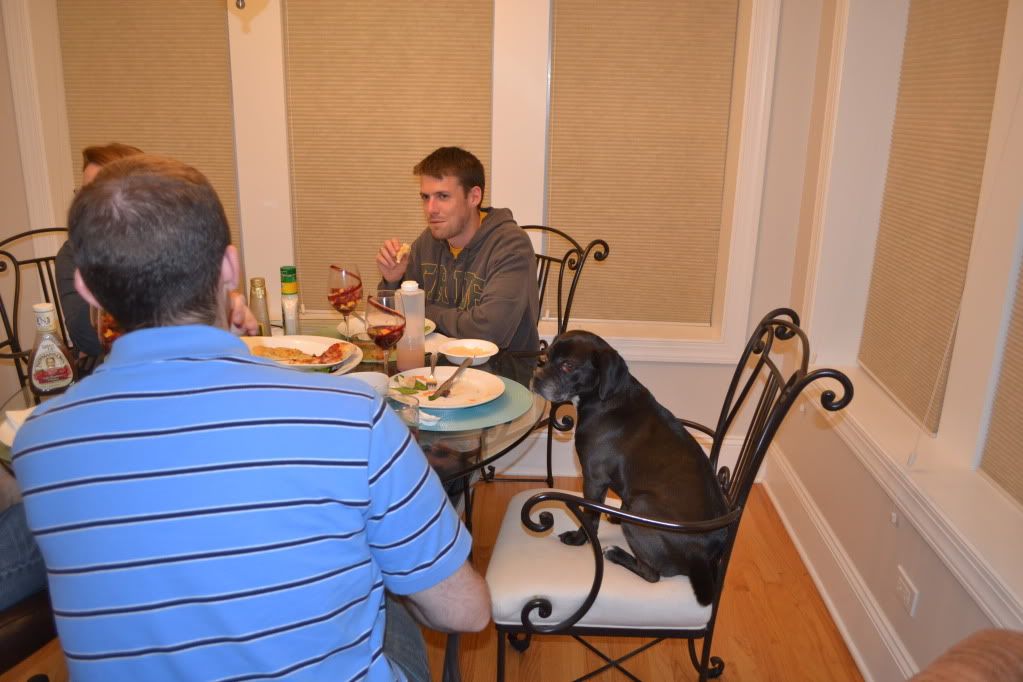
Good friends also go with the flow when you get up from the table and the dog
takes your seat like he's a member of the dinner party

I grabbed my sauce and dough recipes from the New Best Recipe cookbook and was pleasantly surprised by how easy they were and thrilled at how delicious they turned out.  I did go through all 3 of my instant yeast packets (apparently that's why they sell them in three's) but I got it right the last time and everything came together beautifully.

I made a three cheese white pizza with a rosemary garlic olive oil that was AMAZING.  The flavor of the herbs and garlic was wonderful and light.  The fontina, Parmesan and mozzarella cheeses got brown and bubbly and really sent this over the edge.  I think John ate almost an entire piece of the white pizza while walking with his plate from the kitchen to the dining room table.

Photobucket

I also made a half veggie / half margherita pizza with a traditional red sauce that was out of this world.  When John and Roy found out there was leftover sauce in the fridge they warmed some up in the microwave and used it to dip the crust.   

Photobucket

The recipes for the sauce, herb oil and dough are below.  Do as much or as little as you like with this recipe.  I think the dough, sauce and toppings are the perfect trifecta and worth the effort (which is actually pretty minimal).  But I wouldn't hesitate to buy some premade dough at the grocery store to keep this simple on a week night.

If you're not familiar with the New Best Recipe cookbook, it's a good one to consider adding to your collection.  It's done by America's Test Kitchen so it isn't just recipes, it's details on the how and the why behind cooking.  I highly recommend it.

And I highly recommend these pizza recipes, preferably with some good friends and some wine!

*****

All recipes are from New Best Recipe cookbook

Quick Tomato Sauce
20 mins active
makes about 3 cups

Photobucket

1 - 28 ounce can of diced tomatoes (I like Glen Muir organic diced tomatoes)
2 Tbsp extra-virgin olive oil
2 large garlic cloves, minced
2 Tbsp chopped basil
salt and pepper

Place tomatoes in a food processor and process until smooth (about 5 1-second pulses).  Heat the oil and garlic in a medium saucepan over medium heat until the garlic is sizzling, about 40 seconds. 

Stir in the tomatoes.  Bring to a simmer and cook, uncovered, until the sauce thickens enough to coat the back of a wooden spoon, about 15 minutes.  Stir in basil and season with salt and pepper.


Rosemary Garlic Herb Oil (for White Pizza)
15 mins active
makes enough for 3 medium pizzas

Photobucket

1/4 cup extra-virgin olive oil
6 medium garlic cloves, minced
4 tsp minced fresh rosemary leaves

Combine garlic, olive oil, and rosemary.  To make white pizza - brush herb oil over the dough and top with mozzarella, Parmesan and fontina cheeses.


Pizza Dough
30 mins active, 1 1/2 hours total
makes enough for 3 medium pizzas

1/2 cup warm water (about 100 degrees)
1 envelope of instant yeast (about 2 1/4 tsp)
1 1/4 cups water, at room temperature
2 Tbsp extra-virgin olive oil
4 cups (22 ounces) bread flour, plus more for dusting the work surface and hands
1 1/2 tsp salt
olive oil or nonstick cooking spray for oiling the bowl

[note: if you can, use bread flour like the recipe calls for, it will give you the best texture and a crust that is chewy and crisp.  Using all-purpose flour works in a pinch but the crust will be less crisp.]

To make dough:
Measure the warm water into a 2 cup liquid measuring cup.  Sprinkle in the yeast and let stand until the yeast dissolves and swells, about 5 minutes.  Then add the room temperature water and oil and stir to combine.

Place the flour and salt in the bowl of a standing mixer fitted with the paddle.  Briefly combine the dry ingredients at low speed.  Slowly add the liquid ingredients and continue to mix at low speed until a cohesive mass forms. Stop the mixer and replace the paddle with the dough hook.

Knead until the dough is smooth and elastic, about 5 minutes.  The dough will be quite tacky, use a rubber spatula to form it into a ball and put it into a deep oiled bowl.  Cover with plastic wrap.  Let rise until doubled in size, 1 1/2 to 2 hours.

When the dough has doubled in size, press it down in the middle to deflate.  The dough is now ready to use. 

To make pizza:
Place a pizza stone on a rack in the lower third of your oven.  Heat the oven to 500 degrees for at least 30 minutes.

Turn the dough out onto a lightly floured work surface and use a chef's knife or dough cutter to divide the dough into three pieces. [I suggest two pieces, three pieces makes for pretty small pizzas]

Form each piece of dough into a smooth round ball and cover with a damp cloth. Let the dough relax like this for at least 10 minutes but no more than 30 minutes.

Working with one piece of dough at a time and keeping the others covered, shape the dough into a round that is about 1/2 inch thick. Transfer the dough to your pizza peel dusted with semolina flour or corn meal.  If the dough loses it's shape, readjust it on the peel. 

Add sauce and toppings, then slide pizza from the peel onto the hot pizza stone.  Bake until the crust begins to brown. This can be anywhere from 6 to 12 minutes depending on size and toppings.

Remove from the oven using the peel, slice and serve.  Enjoy with a glass of wine, you've earned it!

Thursday, April 5

Fruit & Veggie Resolution Update - week who knows...

It's been awhile since I posted an update on my 2012 resolution to eat 5 servings of fruits and vegetables a day.  Last time I checked in I confessed that the novelty had worn off in February and due to work commitments and being up to my eyeballs in busy, I expected March to be a wash.  And it kind of was.  I did my best to eat fruits and veggies when I could over the past few weeks but I gave up counting servings. 

Surprisingly, when my last event ended last Thursday and I came out of the fog... I found myself craving the good stuff.  When I wanted a snack, I found myself looking for apples and blueberries and bananas.  Sure I was craving nutella to go with the apples and bananas, but it's a big improvement!

In a moment of weakness and at the suggestion of that friend I mentioned earlier this week (Hi Helber!), I ended up at Costco with a cart that included:
  • 18 ounces of blueberries
  • 2 pounds of strawberries
  • a dozen Gala apples (weighing in at 5.5 lbs)
  • 10 lbs of grapefruit

FOR TWO PEOPLE.

Photobucket

Please note this is in addition to the grapes, asparagus and tomato/cucmber salad I already have sitting in my fridge. 

All joking aside, it appears as though my eating habits have finally hit a tipping point.  It took 3 months to turn this from work into a habit.  It no longer requires as much thought and effort, the choices are becoming more natural.

Back to my fruit binge... I want to tell you I saved a lot of money given that it was Costco.  But I saved about $1.20 on the apples and probably $2-3 on the grapefruits.  At the very least, I had a great time eating the samples after work and I'm glad that I won't have to go back to the store every 2 days to stock up again. 

I'm fortunate in that I have a great fridge which keeps fruit very fresh so the apples and grapefruits should be ok. 

The berries could be another story though.  We'll have to see how long the berries last.  I purposefully bought a boat load and then gave them a bath in a mixture of 1 part white vinegar to 10 parts water per a tip I saw on Pintrest.  Supposedly it removes dirt, mold spores, etc and berries will last much longer.  I'll update you on the outcome next week and let you know if the tip is a good one.

Till then, the fruit and veggie resolution is alive and well, even if it is covered in nutella!

Tuesday, April 3

Event brain... aka: sorry I hoarded the beef stroganoff pics

Those of you who know me well, know that last week was one of the biggest work weeks I'll have all year.  My team hosted 50 senior executives from across the country in my home office for 2 days. That combined with a few other projects that all came due within about two weeks of the event and I have a bad case of event brain. 

It's like pregnancy brain, but without an 18 year commitment.

And I had it so bad that my post about beef stroganoff included multiple pictures of my ski trip and absolutely zero pictures of the recipe in reference.  My bad.

I realized this during the middle of the event on Wednesday and texted a friend and faithful reader (Hi Helber!!) to confirm the mistake.

And then I sat around all weekend and drank Spotted Cows and went to the spa with a girlfriend instead of fixing it.  I want to feel bad but I'm still not firing on all cylinders yet and it's very hard to feel bad when you're drinking good beer and playing hooky with a buddy.

So here is the recipe WITH photos. 

Photobucket


Photobucket

Unrelated: is it possible to make crock pot food look appetizing while it's still in the crock pot? With the exception of BBQ and ribs, I'm not sure it is.

Photobucket

Fantastic tip from Mel at Upgrading Melissa, leave a wooden spoon on or over your pot of boiling pasta. When the pot invariably starts to boil over, this will stop it. Pretty cool and it works! PS: doesn't her recipe for roasted asparagus pasta with balsamic butter sauce look yummy?


*****

Crock Pot Beef Stroganoff
20 mins active, 5-6 hours cook time
Serves 4-6


1 pound cubed beef of your choice
2 (10.75 ounce) cans condensed golden mushroom soup
1/2 cup chopped onion
1 tablespoon Worcestershire sauce
1/2 cup water
1 bullion cube
1/2 packet of onion soup mix
Dash of garlic salt
Freshly ground pepper1 heaping Tbsp of sour cream
4 ounces cream cheese 


In a slow cooker, combine the meat, Golden Mushroom soup, chopped onion, Worcestershire sauce, water, bullion cube, soup mix and water.  Season with a dash of garlic salt and some pepper.

Cook on low setting for 5-6 hours (or high for 3-4).  Add sauteed mushrooms 30 minutes before serving.  Stir in cream cheese and sour cream just before serving.  Best served over egg noodles.